Setting Up a DIY Presence Sensor with ESP32 and DFRobot CM4001 MMwave Sensor
I have always used IR sensors for motion detection, and they have worked mostly fine. The main issue is they only trigger on motion, so you have to put in delays in your automations before turning lights off. Otherwise, if you stand still in the room the lights will turn off and you will be waving your hands like an idiot in a dark room trying to get the light come back on. This also means you have lights on in an empty room for way longer than needed. Recently I have discovered mmWave sensors and they are a game-changer. There benefits being they can detect static motion and the ability to sense though materials like fabrics plastics and even drywall (although, this isn’t always a benefit!). In this post, I’ll walk you through setting up a DIY presence sensor using an ESP32 and a DFRobot CM4001 (SEN0610, 12m) MMwave sensor. The only thing I want to change is the case
Inspiration
This project was inspired by a fantastic post from Smart Home Scene. The original post covers the 25m sensor from DFRobot, which has an “out” pin for occupancy detection. However, the 12m sensor discussed here uses a UART bus to provide occupancy and motion data. I couldn’t find a solid guide on how to get this done so I ended up coming up with my own solution and want to share it. A big thanks to the original author for the inspiration!
Components Used
- ESP32 (3-pack): Amazon Link
- Case: Amazon Link
- MMwave Sensor: Amazon Link
Assembly Process
Hardware Assembly
- ESP32: Connect the ESP32 to your computer for initial programming.
- MMwave Sensor: Connect the sensor’s UART pins to the ESP32. On my ESP32 it was GPIO 17 for TX and GPIO 16 for RX. I matched up VCC and GND pins as well.
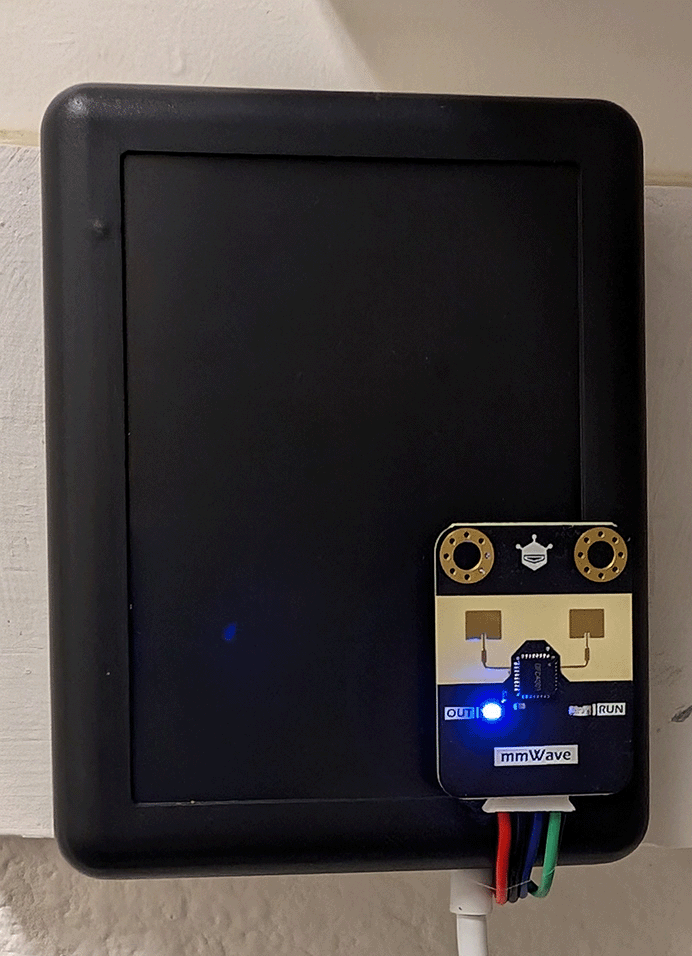
- Case: Place the components inside a project box. Note that placing the sensor inside the case can diminish side detection. I moved the sensor outside the case for better performance.
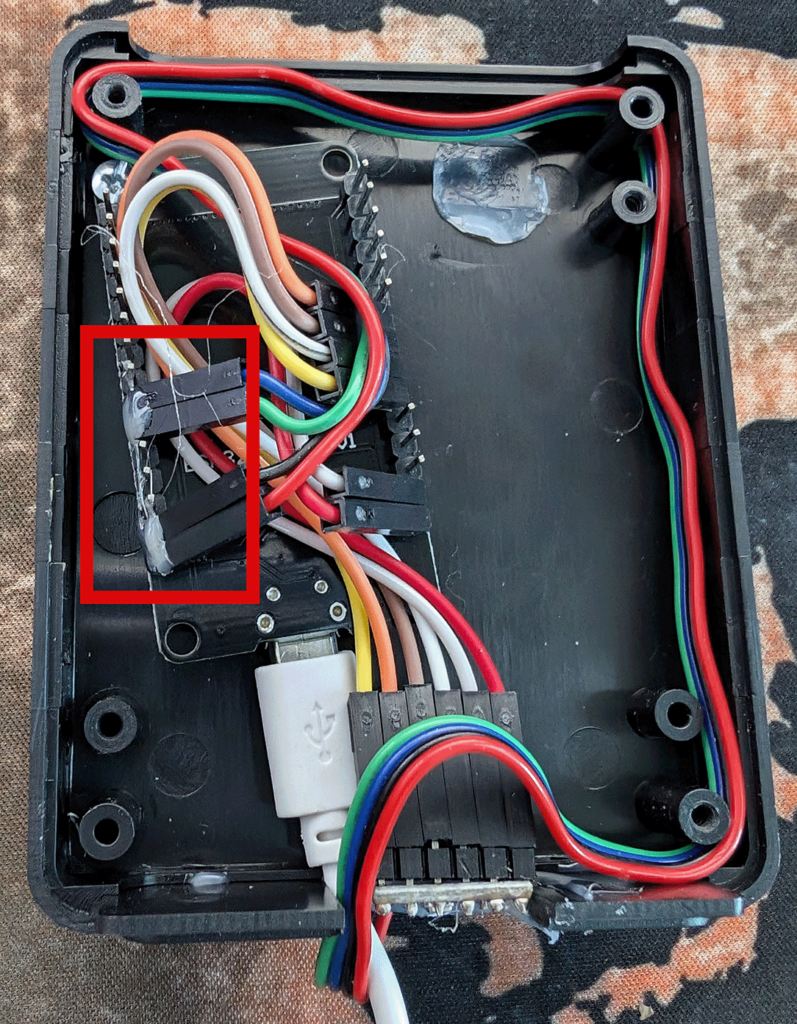
Here is what the inside of my kitchen sensor looks like. (ignore the connections on the right, these are for a temperature sensor). Notice I had to bend the pins slightly to get the top of the case on, not ideal but it worked.
3D Printed Case
A 3D-printed case would be more aesthetically pleasing and customizable. However, project boxes are convenient for initial setups when the final form factor isn’t known.
Software Setup
ESPHome Configuration
Here is my ESP32 config. The bulk of this came from Smart Home Scene so again, thank you! The main parts I added are the include for UART read line and the text sensor to output the UART text. I swear I found the uart_read_line_sensor.h on the ESPhome site but I cannot find it again to give them credit. I will update the post if I come across it again.
esphome:
  name: "kitchen-esp"
  friendly_name: kitchen-esp
  includes:
    - uart_read_line_sensor.h

esp32:
  board: esp32dev
  framework:
    type: arduino

logger:

api:
  encryption:
    key: "your_encryption_key"

ota:
  password: "your_ota_password"

wifi:
  ssid: !secret wifi_ssid
  password: !secret wifi_password

  ap:
    ssid: "kitchen-esp Fallback Hotspot"
    password: "fallback_password"

captive_portal:

uart:
  id: uart_bus
  tx_pin: GPIO17
  rx_pin: GPIO16
  baud_rate: 9600

text_sensor:
  - platform: custom
    lambda: |-
      auto my_custom_sensor = new UartReadLineSensor(id(uart_bus));
      App.register_component(my_custom_sensor);
      return {my_custom_sensor};
    text_sensors:
      id: "uart_readline"
      name: "Raw UART Message"

sensor:
  - platform: uptime
    name: "system uptime"

  - platform: wifi_signal
    name: "wifi strength"
    update_interval: 60s

switch:
  - platform: template
    name: "mmWave sensor"
    id: mmwave_sensor
    disabled_by_default: True
    entity_category: config
    optimistic: true
    restore_mode: RESTORE_DEFAULT_ON
    turn_on_action:
      - uart.write: "sensorStart"
      - delay: 1s
    turn_off_action:
      - uart.write: "sensorStop"
      - delay: 1s

number:
  - platform: template
    id: range_minimum
    name: "Range (Minimum)"
    min_value: 0
    max_value: 12
    initial_value: 0
    optimistic: true
    step: 0.1
    restore_value: true
    unit_of_measurement: m
    mode: slider

  - platform: template
    id: range_maximum
    name: "Range (Maximum)"
    min_value: 0
    max_value: 12
    initial_value: 12
    optimistic: true
    step: 0.1
    restore_value: true
    unit_of_measurement: m
    mode: slider

button:
  - platform: template
    name: "Set Distance"
    id: set_distance
    on_press:
      - switch.turn_off: mmwave_sensor
      - delay: 1s
      - uart.write: !lambda
          std::string ms = "setRange " + to_string(id(range_minimum).state) + " " + to_string(id(range_maximum).state);
          return std::vector<unsigned char>(ms.begin(), ms.end());
      - delay: 1s
      - uart.write: "saveConfig"
      - delay: 1s
      - switch.turn_on: mmwave_sensor
Custom UART Read Line Sensor
Place this in the uart_read_line_sensor.h file in the ESPhome folder which is in same directory as your configuration.yaml:
#include "esphome.h"

class UartReadLineSensor : public Component, public UARTDevice, public TextSensor {
 public:
  UartReadLineSensor(UARTComponent *parent) : UARTDevice(parent) {}

  void setup() override {}

  int readline(int readch, char *buffer, int len) {
    static int pos = 0;
    int rpos;
    if (readch > 0) {
      switch (readch) {
        case '\n': break;
        case '\r': rpos = pos; pos = 0; return rpos;
        default:
          if (pos < len-1) {
            buffer[pos++] = readch;
            buffer[pos] = 0;
          }
      }
    }
    return -1;
  }

  void loop() override {
    const int max_line_length = 80;
    static char buffer[max_line_length];
    while (available()) {
      if (readline(read(), buffer, max_line_length) > 0) {
        publish_state(buffer);
      }
    }
  }
};
Home Assistant Configuration
Templates for Occupancy and Motion Sensors
These are the template sensors. Add these into your configuration.yaml file under the Sensor: section.
- name: "Kitchen Occupancy"
  state: >-
    {% set message = states('sensor.bt_proxy_main_raw_uart_message') %}
    {% if message.startswith('$DFHPD') %}
      {% set parts = message.split(',') %}
      {% if parts[1] == '1' %}
        Occupied
      {% else %}
        Not Occupied
      {% endif %}
    {% else %}
      {{ states('sensor.kitchen_occupancy') }}
    {% endif %}

- name: "Kitchen Motion 1"
  state: >-
    {% if states('sensor.bt_proxy_main_raw_uart_message').startswith('$DFDMD,1,1,') %}
      {% set parts = states('sensor.bt_proxy_main_raw_uart_message').split(',') %}
      {{ parts[3] | float }}
    {% else %}
      {{ states('input_number.kitchen_motion_1') | float }}
    {% endif %}

- name: "Kitchen Motion 2"
  state: >-
    {% if states('sensor.bt_proxy_main_raw_uart_message').startswith('$DFDMD,1,1,') %}
      {% set parts = states('sensor.bt_proxy_main_raw_uart_message').split(',') %}
      {{ parts[5] | float }}
    {% else %}
      {{ states('input_number.kitchen_motion_2') | float }}
    {% endif %}
Experience and Observations
I installed the sensors in my kitchen and laundry room. They work perfectly, though they’re almost too sensitive. The sensors can detect motion through walls, which caused the laundry room light to turn on from the other side of the wall. Adjusting the detection distance fixed this issue.
In the kitchen, the sensor performs excellently. The lights remain on as long as I’m present and turn off within a few second after I leave.
Challenges and Future Improvements
Initially, I attempted to process the UART data directly on the ESP32, but it kept crashing. I switched to sending raw UART messages to Home Assistant and parsing them there, which worked well. I also created sensors for the two motion values, although their exact meaning is still unclear. It seems to be motion intensity for each sensor but I’m not 100% sure.
I tried using BLE with the sensor, but it caused the device to crash. Adding a temperature sensor to the same ESP32, however, worked well. I might explore this further in a future post.
Conclusion
Setting up a presence sensor with the ESP32 and DFRobot CM4001 was fun and it enhances my light automations. These little ESP32 devices have turned into a little hobby for me so I don’t think this is the final form of this sensor but it was fun to make. I will post more about ESP32 for sure! Feel free to use the provided code and configurations to build your own system.