Yubikey and Full disk encryption

Full disk encryption is a great way to secure your hard drive. The downfall to it though is to make it truly secure you need to have a long password, and typing it in at each boot is painful. Enter the Yubikey. You can use the secondary slot in your Yubikey for a challenge/response to unlock your disk. This way you can setup a pretty easy/short challenge password but since it needs to match up with your Yubikey to unlock an encrypted disk it is a lot more secure. In this post ill show you how I set it up on my laptop. When i set it up I followed these two articles: one and two. I like number two a little better but there is a part mentioned in number one about modifying the file at /etc/ykluks.cfg to have a custom message at the unlock screen. Since those two did such a good job I wont go into crazy detail but here are the basic steps. See the linked articles for a more detailed steps:
Step 1: Setup Linux with encrypted LUKS
Pick the distro you want to use (I’m currently using Kubuntu). During install make sure to check the box to encrypt the disk. It will make you set a password. I recommend a easy password at this point and we can change it later on.
Step 2: Install the yubikey-luks package
install this package:
sudo apt update && sudo apt install yubikey-luksStep 3: Setup Yubikey slot 2
Yubikey comes with two slots and if you dont know that you are probably using slot 1 only which is good for this step. To setup slot 2 for challenge/response run the following:
ykpersonalize -2 -ochal-resp -ochal-hmac -ohmac-lt64 -oserial-api-visibleMake sure you do this on your backup key as well
Step 4: Find Encrypted Drive Name
To find the name of the disk we need to encrypt run:
lsblk --fs
We’re looking for the name next to crypto_LUKS in this case it is nvme0n1p3
Step 5: Enroll Primary Yubikey
We are going to write to slot 6 first with our primary key and then slot 7 with the backup key.
sudo yubikey-luks-enroll -d /dev/nvme0n1p3 -s 6You will be asked for two passwords here first one is the password you want to use for challenge/response each time you unlock the disk. You will enter that twice and then be asked for an existing password to unlock the disk. This is the password you entered during the OS setup for LUKS.
Step 6: Enroll Backup Key (optional but highly recommended)
If you have a second Yubikey now is a good time to enroll it. The command is similar:
sudo yubikey-luks-enroll -d /dev/nvme0n1p3 -s 7You will be asked for two passwords here first one is the password you want to use for challenge/response each time you unlock the disk. I recommend using the same one you picked for your primary key so you don’t get confused. You will enter that twice and then be asked for an existing password to unlock the disk. This is the password you entered during the OS setup for LUKS.
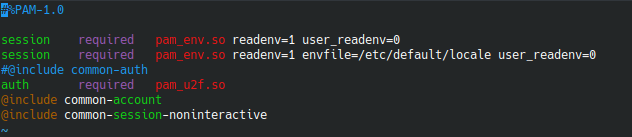
Step 7: Make it work! Edit Crypttab
Now we we need to edit the /etc/crypttab file to look at the yubikey unlocking script.
vi /etc/crypttabBefore editing my file looked like this:
nvme0n1p3_crypt UUID=19ed1cf2-bcdd-4184-9a1b-21087rg231d none luks,discardWe need to add this line “keyscript=/usr/share/yubikey-luks/ykluks-keyscript” in right after luks, so the end file looks like
vme0n1p3_crypt UUID=41eg3cf3-bctd-4481-3a1c-24099f25474e none luks,keyscript=/usr/share/yubikey-luks/ykluks-keyscript,discardStep 8: Reboot and test
Now reboot and make sure your Yubikey. You need to have the Yubikey plugged into your PC before the unlock screen shows up or it doesn’t read you Yubikey. If you don’t already have it plugged in all is good just plug it in and enter a blank password, it will fail and come back, enter your password and hit enter and it will work this time. After you test the primary key reboot and do the same with the backup.
Step 9: Change the manual passphrase
During the initial setup of the encrypted disk you entered a simple password for unlocking the disk. Now that we have the Yubikeys setup lets change that pw to something long. I made mine 40 characters long and saved it in my password vault. To change yours run:
sudo cryptsetup luksChangeKey /dev/nvme0n1p3Change the nvme0n1p3 part with your device. It will ask you for for the password you want to change and then have you enter the new one twice. That’s it! All done! We now have a disk that is fully encrypted and can unlock with challenge/response + Yubikey or our super long passphrase.