I Built a Home Assistant Panel With an AI Agent, and It Has a Tamagotchi
Sixty dollars of touchscreen sits on my desk running my house, my meetings
and my AI agents. An AI agent wrote most of it. One page is a small robot
that judges my work ethic. The story’s below, and under that, everything you
need to build your own.
 |
 |
 |
 |
Every one of these screenshots was taken by the panel itself, over an
endpoint you’ll meet at the end of the story.
part one: the story
why this thing exists
The SenseCAP was a Christmas gift from my wife, Beka. I’d been eyeing it as
a couch dashboard — control the lights without getting up. The dashboard I
built kinda sucked, I barely used it, and the screen went in a drawer. Which
means the first version of this project was me putting my wife’s Christmas
gift in a drawer. Not my best work.
What got it back out wasn’t home automation. I wanted a Stream Deck —
something on the desk to drive my AI agents and my computer, and above all
my mic and camera, because most of my working day is Teams calls. A screen
that mutes me in one tap turned out to be worth more than a screen that dims
the lights. The drawer opened, the house controls came back along for the
ride.
The pet came third. The controls were fun enough that I wanted something to
fiddle with while an agent ground through a task or a meeting ground through
its agenda. I had a Gigapet as a kid. My kids carry their own versions now.
So there’s one on my desk that only grows when I get things done, and the
plan is to keep making it more capable — the powers are the point.
The part I can’t get over: all of this took an LLM, an idea, and a few
evenings of tinkering. Two weeks from drawer to everything in this post.
Solo it would have taken me months, if I could have gotten it to this level
at all. It sits with me daily, so it keeps growing.
what it actually does
Five tabs across the bottom. Everything readable from six feet, because a
panel you have to lean into is a phone with extra steps.
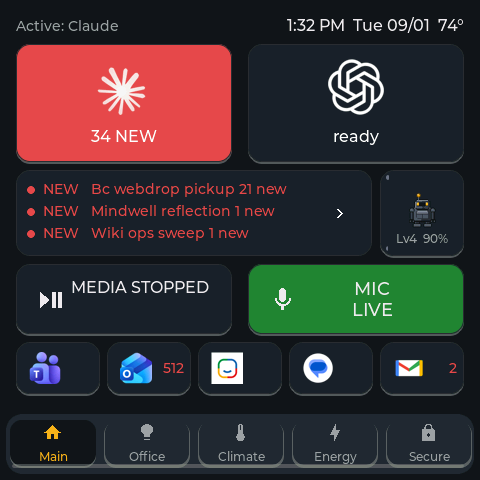
Main is the reason the drawer opened: media transport, a global mic mute
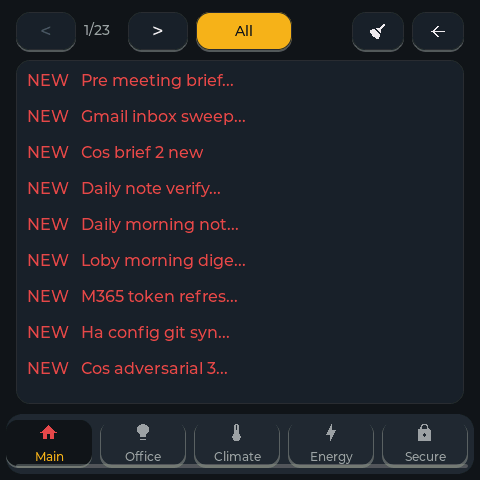
that reports real state, and a live list of my running AI sessions tagged
NEW or RUN so I can see which one is waiting on me. Within an hour of a
meeting the top-left readout turns into a countdown — amber, red under five
minutes, then NOW:. Bottom-right is a small tile with a creature in it and
two thin status bars. That’s the pet. More on him shortly — he’s the
best part, and also the part that taught me the most about measuring things.
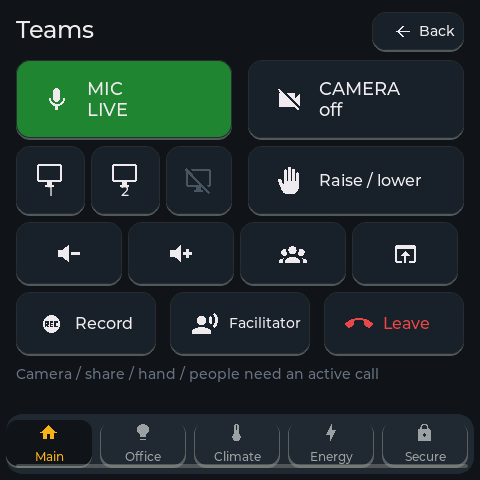
The page that got the screen out of the drawer. Mic and camera are one tap
each; everything below them needs an active call.
 |
 |
 |
 |
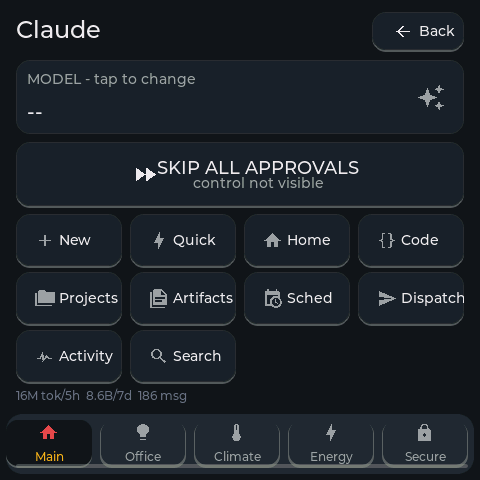
The work pages. The sessions list — twenty-three pages of chores my agents
ran, mostly while I slept. Claude’s page: MODEL -- means no window is open
right now, and the page says so rather than guessing; the footer is live
though — 8.6B tokens over 7 days, and you should remember that number,
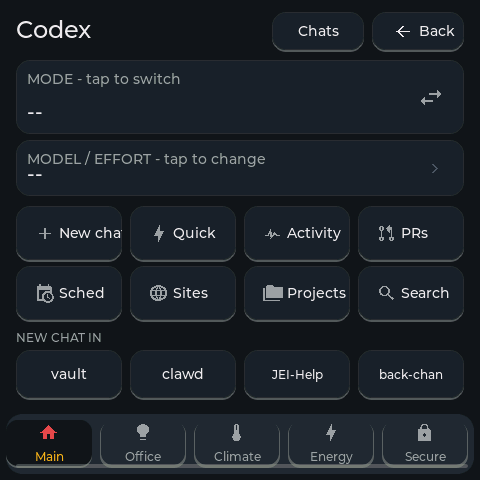
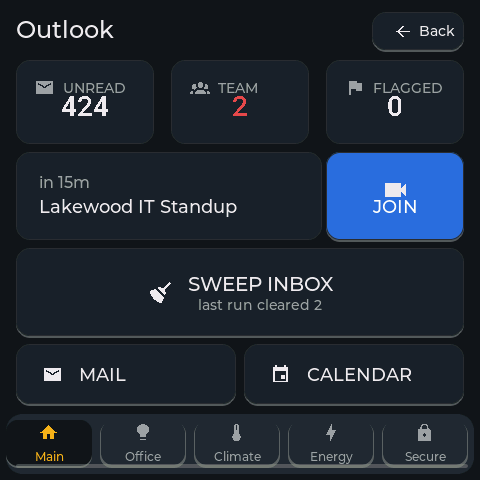
because the pet section explains it. Codex gets one-tap new chats in the
repos I actually use. And Outlook: unread counts, the next meeting with a
JOIN button, and an inbox sweep — yes, that is a real standup, fifteen
minutes out.
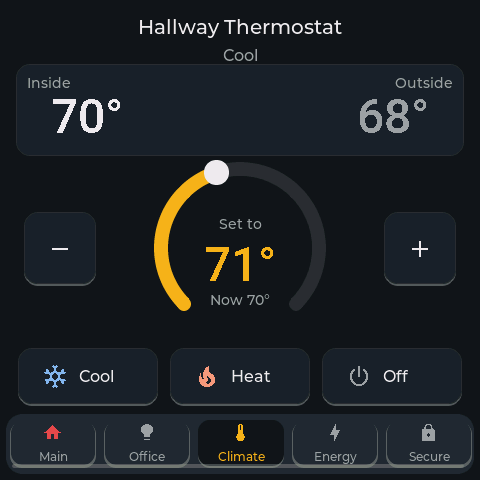
Climate. A big setpoint with the current temperature under it, outside
temp beside it, Cool / Heat / Off. Plus and minus move it a degree. That’s
the whole page, and it gets used more than anything else on the panel.
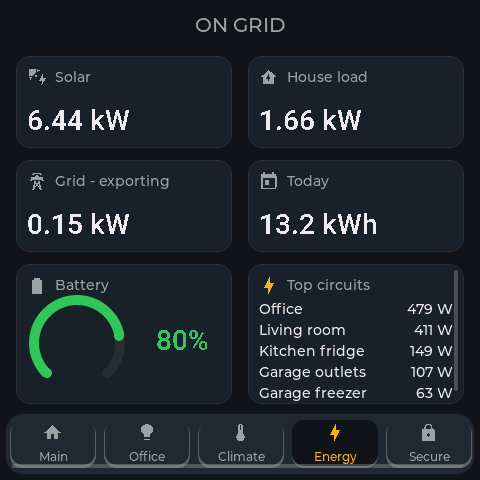
Energy. Solar now, house load, grid, today’s kWh, battery as a ring —
and a live top-five of the house’s actual circuits from the SPAN panel, so
“why is the house pulling four kilowatts” is a glance, not an investigation.
Across the top, a grid badge reading GRID ON GRID in gray, which during an
outage becomes ON BATTERY 6h left in red — hours computed live against
actual house load rather than a fixed rate. When the AC kicks in, the number
drops. That’s the whole point of it. (It has also never rendered in red, and
I’ll come back to why.)
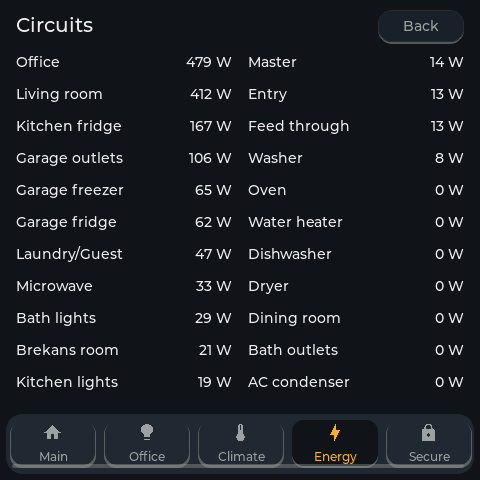
Tap the top-five tile and you get every circuit in the house, sorted by
draw.
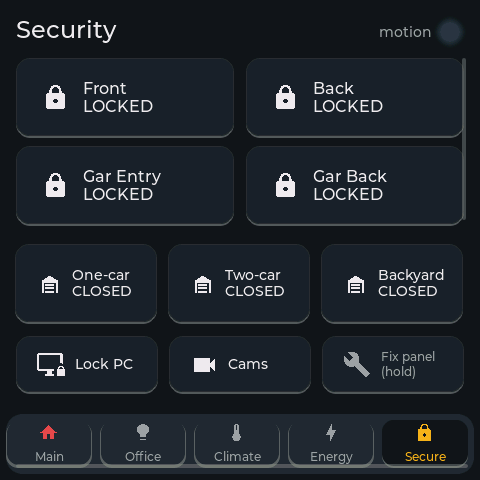
Security. Door locks, garage doors, a motion light fed by the cameras.
Locks are tap to lock, long-press to unlock. Garage doors are long-press
only. A panel on a desk is easy to brush against, and one stray elbow should
never open a garage.
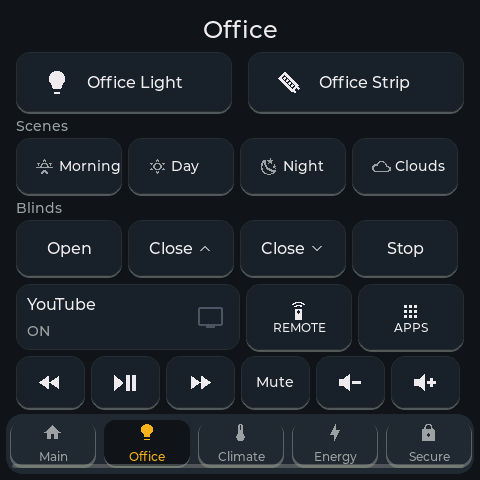
Office. Lights, four LIFX scenes, the blinds, the TV. The now-playing
readout says Netflix rather than com.netflix.ninja, because the panel
strips the reverse-DNS boilerplate and title-cases what’s left. Small thing.
Bugged me for a week.
 |
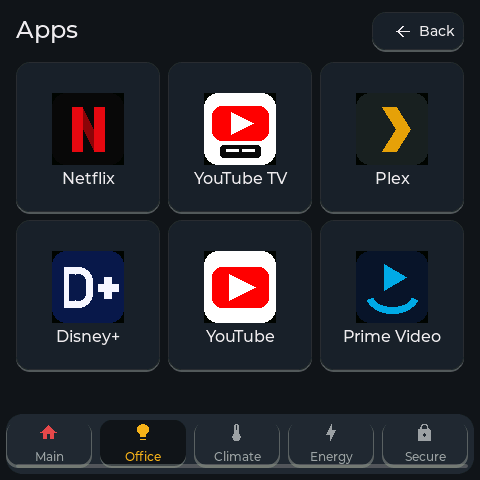 |
The office page, and one of its sub-pages — the app launcher. Sub-pages are
how everything past five tabs fits.
When the monitor sleeps the panel doesn’t. After 90 seconds it becomes a dim
ambient clock with the next meeting and a three-line AI-written brief of my
day; after ten minutes it sleeps properly. Any touch wakes it.
the pet
One page of five, and the reason you’re still reading.
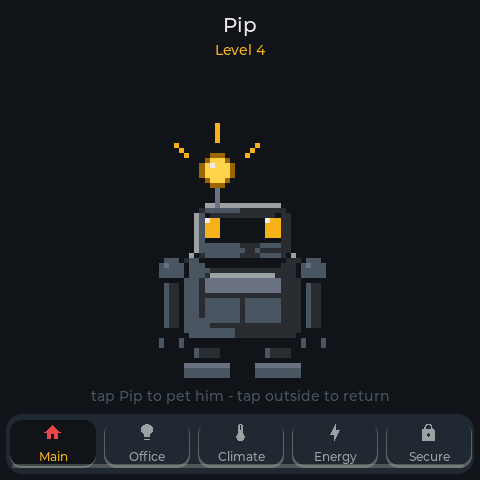
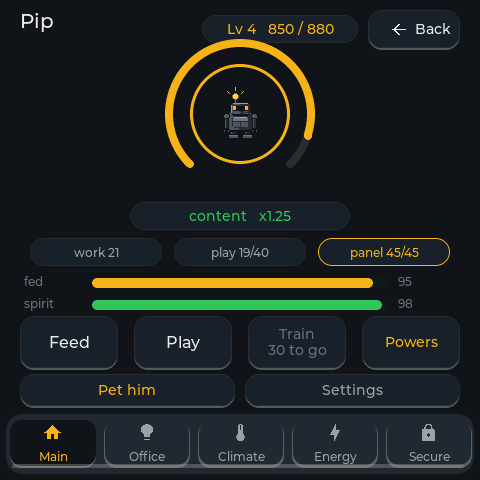
He started as an egg and grows through eight stages, all drawn by a Python
script using nothing but ellipses and polygons — and after I told the agent
the first sprite was “kinda cute but waaaay too plain”, he became a chamfered
little gunmetal robot named Pip with fifty-one animation frames. He blinks.
He waves. He droops when I neglect him, sleeps nine to seven with Zzz over
his head, and does a different signature move at every level — the level-8
one fires his jetpack.
He earns XP from things I actually did, and he stops caring entirely when
I’m not there: away from home, PC locked, monitor off, in a call, something
on fire — nothing accrues. The away gate is one line reading the standard
person entity your phone already updates, and it’s the one that matters.
Weekends cost nothing. Holidays cost nothing.
No streaks. A streak is a mechanism whose only purpose is to make
stopping feel bad. I didn’t tune it down, I didn’t build it. He can’t die,
can’t lose a level, can’t interrupt me. Well-tended earns 1.25x and neglect
earns 1.0x — there is no multiplier below 1.0 anywhere in the design.
At level 8 he goes Ascendant, and evolving him rebuilds his body from a
96-part modular library — four metal families, seeded rolls
(hash(name, form, roll_index)) so a crashed retry can never re-roll him
into a different creature. His first evolution is already determined by math
nobody can see. I know because the dry-run is deterministic; I don’t know
what he’ll look like because I haven’t earned it yet.
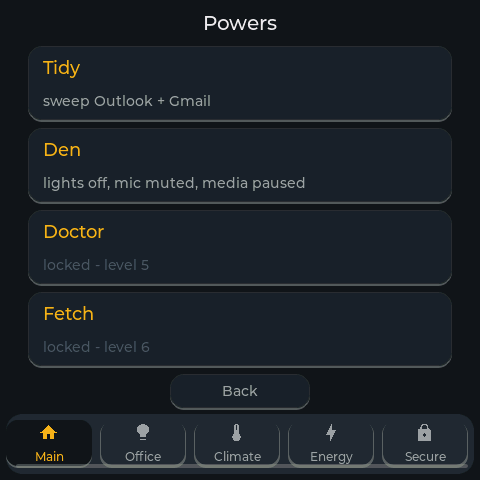
Leveling also unlocks powers — buttons that do something I could already
do by hand, like sweeping my inboxes or setting the room up for deep work.
A power never sends, deletes, moves or spends anything; that rule is load-
bearing.
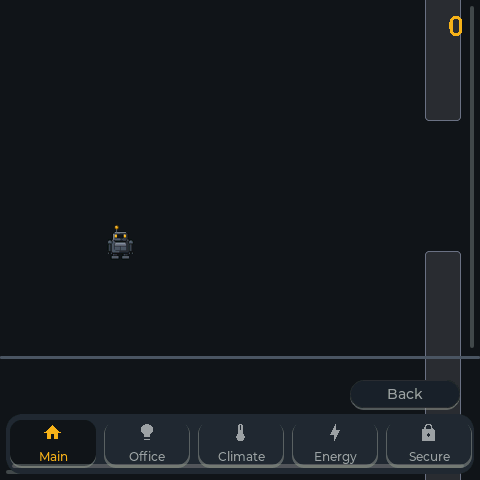
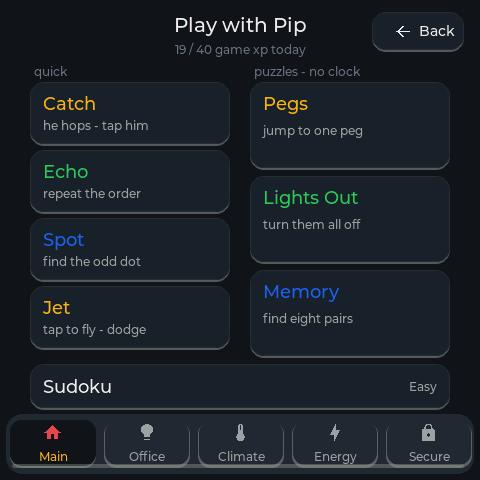
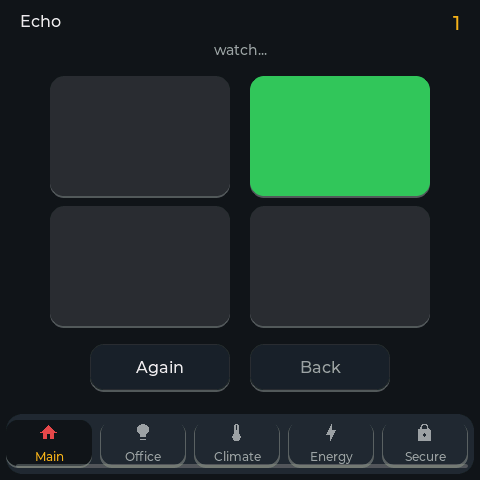
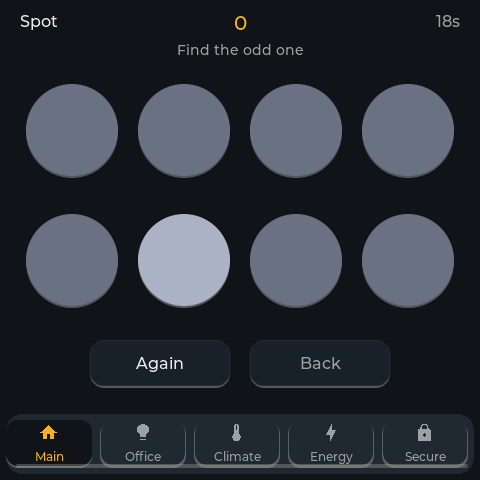
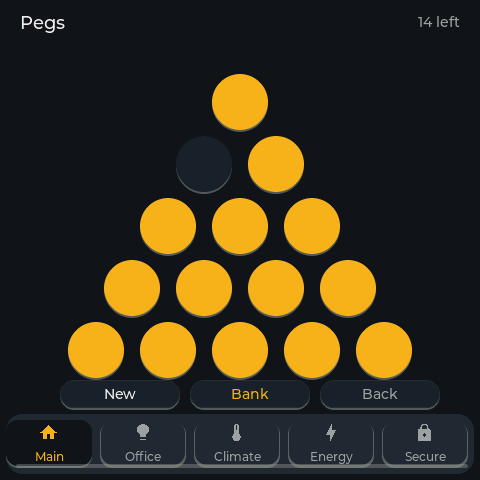
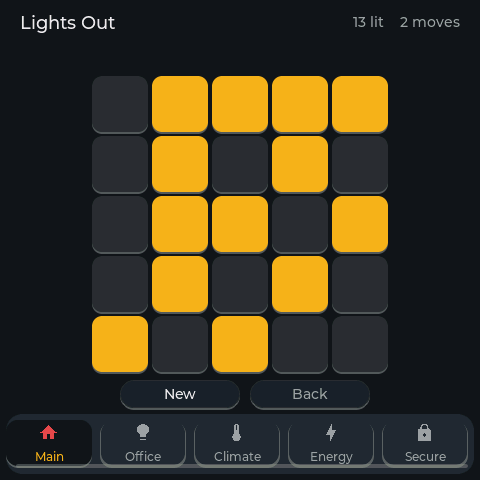
And he runs an arcade. Eight games, all in ESPHome YAML on the panel itself,
each feeding him a little spirit when I play:
 |
 |
 |
 |
 |
 |
 |
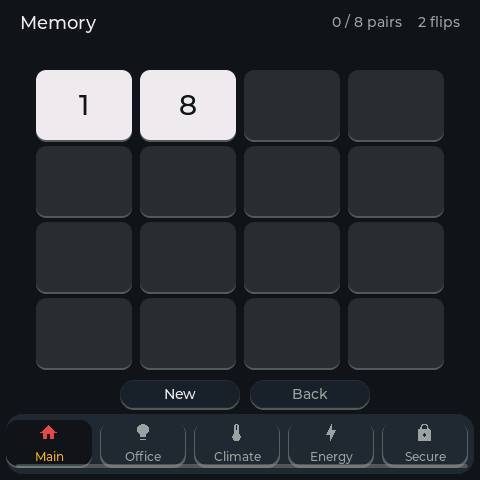 |
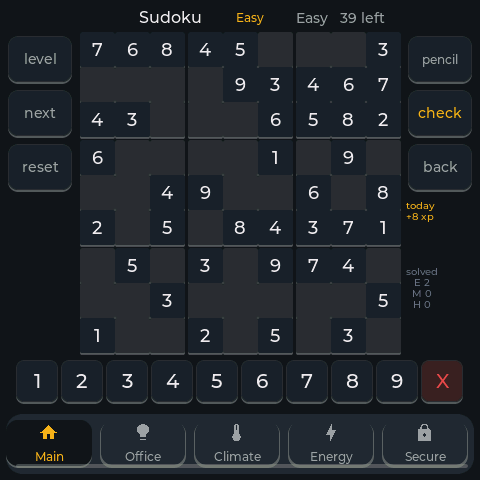
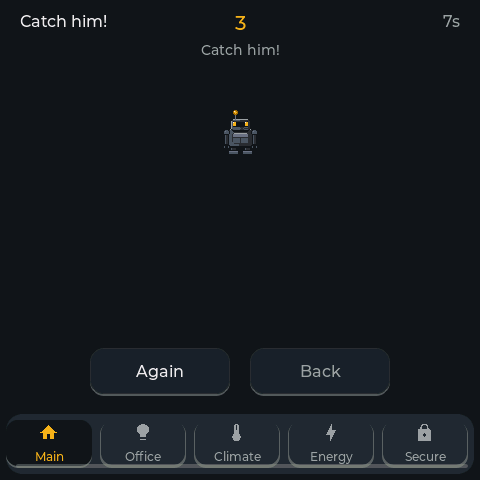
The hub, the daily sudoku (with pencil marks, because I have standards), and
six more: Catch, Echo, Spot, peg solitaire, Lights Out, Memory. Jet you
already saw mid-flight at the top.
And here’s the measurement story that shaped all of it. The first design
scored him on how many tokens my AI sessions burned. Obvious, right? More
tokens, more work. I measured a week first: 8.36 billion tokens, of which
95.8% was cache reads. An agentic loop re-reads its cached prompt every
single turn. That number is a property of the harness, not of anything I
did — the pet would have earned twenty-four times its weekly budget for
sitting perfectly still.
None of that signal is broken. It goes up, reliably, and it looks exactly
like productivity. Before you wire a counter to a reward, go check what
fraction of it a machine produces while you’re asleep. If it’s most of it,
you’ve built a progress bar with a face.
the weekend the panel grew eyes and a finger
The newest chapter, and it changes how I verify everything.
Three firmware updates in a row reported “OTA successful” — and weren’t
running. The new build crashed on its very first boot (the boot-time LVGL
theme walk finally outgrew the default 5-second task watchdog), the
bootloader silently rolled back, and the old firmware answered the
network, so every check I’d naturally write passed. A human noticed a
missing feature. The fix was one sdkconfig line; the lesson was bigger:
“OTA successful” is a lie you’ll believe three times.
So we made the panel show us its own screen. About 200 lines of custom
component now serve GET /screenshot — the live framebuffer as a BMP — and
GET /tap?x=&y=, a synthetic 120 ms press through a second LVGL pointer
device that the UI polls exactly like my real finger. Tap-only on purpose:
the lock page needs a long-press, and a virtual finger that cannot hold
cannot unlock doors. There’s a /view page that puts both together —
the screen refreshing in a browser tab, where clicking the image taps the
panel. The agent now verifies every deploy by driving the UI and looking at
pixels, and every screenshot in this post was taken by the panel itself.
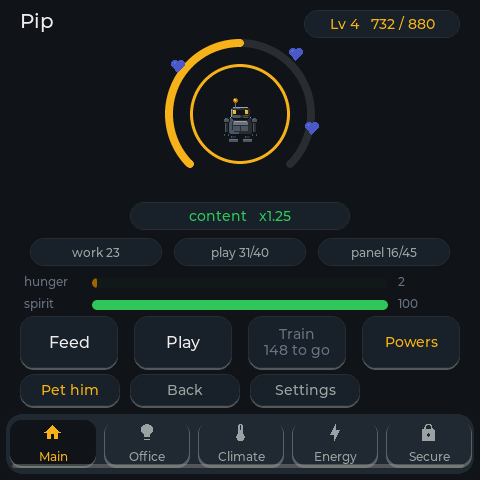
The first thing the agent did with its new finger was visit the pet page and
pet him. So we taught Pip to check which input device the press came
from: red hearts when it’s my finger on the glass, blue hearts when it’s the
agent’s virtual one, and the Home Assistant logbook reads “petted by Loby —
+8 spirit”. That screenshot is up top. A $60 desk toy that knows its two
owners apart.
part two: build your own
Everything below is the practical half: hardware, honest expectations, how
to work with an agent on this, the traps, and the build order with a check
at every step.
what you need
A Seeed SenseCAP Indicator D1 —
about $60. 4 inches, 480×480, ESP32-S3 with 8MB flash and octal PSRAM,
capacitive touch. The D1S and D1Pro work fine too; their extra
air-quality sensors just hang off a second chip nothing here talks to, so
you’re paying for hardware you won’t use.
A USB-C cable and somewhere to plug it in permanently. There’s no battery.
The cable does the first flash and then keeps it alive; everything after that
is over the air.
Home Assistant, already running, and the ESPHome add-on installed from the
add-on store. If you don’t have HA yet, this isn’t your first project.
That’s the bill of materials. The panel is the entire cost.
what you’ll get, honestly
Before you commit an evening: my five pages are not in the repo. They’re
welded to my entity IDs, my rooms and my hardware, and publishing them would be
publishing my house rather than a project.
What is in there: the chrome (nav bar, tile styles, sub-pages, ambient idle),
the plumbing that makes data arrive reliably, every trap below with its
reasoning, the agent prompt, the remote view-and-tap component, and the pet in
full with its games.
So you get the skeleton and one finished limb. The layout is yours — and that’s
the half an agent is genuinely good at.
One more thing, because I’d want to know: the repo is a new assembly of
config that runs on my desk. The blocks are lifted from a working panel; the
packaging is new and hasn’t been through a compiler in that exact shape. Expect
to fix a thing or two, and open an issue when you do.
how i actually built it
I did not hand-write this config. I built it with an AI agent, over a few weeks
of evenings, and that’s the part worth talking about.
LVGL config is long, repetitive and positional. Every widget is an x, a y, a
width, a height and a color. A sudoku board is eighty-one near-identical
blocks that differ only in coordinates.
What the agent was genuinely great at: generating a whole page from a
description, keeping styling consistent across hundreds of widgets, doing the
arithmetic when I said “shift everything below this down 40 pixels”, and
writing the same parsing lambda forty times without typoing the thirty-first.
What it cost me. Twice, a scripted edit across the whole config corrupted
it. Both times the fast fix was git restore and doing it again in smaller
pieces — not debugging the damage. Commit before you let an agent loose on a
big file. And two of the four failures below are the agent cheerfully reporting
success on work that didn’t work.
Net: it saved me weeks and cost me maybe three evenings. I’d do it again, but I
wouldn’t do it unsupervised.
Where it fell down, every single time, the same way: it reported success on
a clean compile.
A successful compile means the YAML parsed and the C++ built. It says
nothing whatsoever about whether anything appears on the screen.
So the loop that works is esphome config, then esphome compile, then look
at the panel — and when the agent asks whether it worked, it has to ask
something specific. “Is there a number in the top-right of the energy page, and
what does it say” gets a real answer. “Did it work?” gets a shrug. (This is
the loop the screenshot endpoint eventually automated — the agent looks at
the pixels itself now.)
The other rule that saved me: on the second identical failure, stop. If the
same step fails twice the same way, a third variation won’t help. Something in
the mental model is wrong, and more attempts produce confident wreckage.
The prompt I use is in the repo at agent/SEED-PROMPT.md (also as an
installable skill). The important thing about it is that it makes the agent
interview you before it writes a line — how you reach Home Assistant,
add-on or standalone ESPHome, what your device is actually called, what
entities you have. Your entity IDs aren’t mine. An agent that assumes otherwise
writes beautiful YAML for hardware you don’t own.
the four ways i got it wrong
These are the good bits. Every one of them is silent.
The afternoon I lost to a color. Values on two pages went blank. Not
dashes — nothing, while the caption above each rendered fine. I chased the data
for hours: checked every entity directly against Home Assistant (all live),
suspected HA wasn’t sending initial state (the device log did show a 14.7-second
gap after boot, but forcing a refresh changed nothing), suspected values lost at
boot.
What settled it was making the device tell me what it held: I published the
five sensors back to HA as Echo … entities and every one matched exactly. The
data was never the problem. The tell had been in the config all along:
style_definitions:
  - id: tile
    bg_color: 0x1E2228
    radius: 14
    # ⚠️ Without this line, every label inside this tile renders
    #    near-black on near-black and looks exactly like a dead sensor.
    text_color: 0xE8EAED
The screen-level text color is real, but LVGL’s default theme re-asserts a
dark color inside plain containers. Button labels inherit correctly, which is
exactly why one page looked perfect while another looked broken.
Two lessons worth more than the fix. When widgets fed by different entities
fail together while others on the same integration work, stop investigating
the data and diff the widget definitions. And publish the device’s own view of
a value early — one echo entity turns a day of inference into a fact.
The general form of all of this is the blockquote above, which is why it’s a
blockquote.
The aura that worked perfectly and was invisible. I added a glow behind the
pet at level 3. Reported back: “the look hasn’t changed.” The show/hide
logic was firing correctly the entire time. It was an 84×84 amber fill at 16%
opacity sitting behind a 64×64 sprite — so about ten pixels of margin ever
showed, at 16% amber on near-black, which is to say nothing. Correct logic,
invisible by construction. It’s a 3-pixel ring outline now and you can see it
across the room.
The entity that got squatted. I tested an automation before the device
published its sensor, so I POSTed a fake state to the ID it would eventually
own. That creates a real entity registry entry. When the device came up it
found the ID taken and silently claimed ..._2 instead. The automation went on
watching the corpse, which never changes again, and never fired. Nothing
errors, nothing logs, the feature is just dead. The _2 suffix is sticky, so
deleting the orphan doesn’t hand the ID back — you rename the sensor on the
device. Never POST a fake state to an ID a device will later own.
The badge that would have lied twice per outage. Building the grid badge, I
pulled the history from a real power cut instead of designing from the spec.
Two of the obvious source entities were green for the entire outage — one had
changed state exactly once in the window, and that was its integration dropping
to unavailable. Wire one of those up and you have an indicator that can’t go
red during the event it exists for. Read your candidate entity’s history
across a real occurrence before you trust it.
The outage also held two transients under fifteen seconds. Without a hold,
the badge flashes red for five seconds on a Sunday morning and teaches you to
ignore it, so it now needs the state to survive sixty. And the debounce paints
through a committed value rather than the live sensor, because the 30-second
repaint also calls the badge painter and would sail straight past the hold.
A repaint that recomputes from raw inputs bypasses whatever was supposed to
gate it.
build it in this order
Each stage is small and each has a check. Don’t skip the checks; that’s where
the whole thing lives. (The repo’s docs/media/ has stills of every
finished page — all five tabs, the sub-pages, the pet screens and all eight
games — so you can see what each stage is aiming at.)
First, the two ESPHome worlds. The add-on is a web UI: edit YAML in a
browser, hit Install, it validates and compiles for you. Standalone
ESPHome gives you esphome config and esphome compile on a command line.
Both work. Where I write “validate and compile”, that’s the Install button or
those two commands, your choice — and tell your agent which one you’re on
before it writes anything, because it changes every file path.
1. Secrets and Wi-Fi. (15 minutes.) In the add-on, open secrets.yaml
and add your Wi-Fi SSID and password, plus an API encryption key and an OTA
password. The repo’s esphome/secrets.yaml.example lists exactly what’s
needed. Check: the file saves without a YAML error.
2. Flash it and see anything. (30 minutes, mostly waiting.) Take
esphome/example-device.yaml from the repo, drop it in as a new device, plug
the panel in over USB-C, and install. First flash is wired; every one after is
over the air. Check: the panel lights up and shows something. That’s all
you’re asking for.
3. Adopt it in Home Assistant, and turn actions on. (5 minutes.) HA will
offer to adopt the new ESPHome device. Then, on the device page, enable
“Allow the device to perform Home Assistant actions.” Every control button
silently does nothing until you do, with no error message anywhere. Check:
wire one button to one light and watch the light.
4. Build the chrome. (An evening.) Nav bar, tile styles, one page with
one real control. Five tabs at 86 pixels fills a 456-pixel bar, so five is your
ceiling — everything past that is a sub-page: no tab of its own, reached from
a tile, with a Back button. esphome/patterns/tiles-nav-and-idle.yaml has the
styles and the nav script. Check: read every label on the panel. This is
where the dark-on-dark trap catches you, and catching it now costs a minute.
5. Add one page at a time. (An evening or two per page.) Hand your agent
the seed prompt, tell it which page and which entities, let it write. Validate,
flash, look. Then the next one. Check each page before starting the next —
a compile error in page five is easy to find, a rendering bug you introduced
three pages ago is not.
6. Make the data arrive reliably. (An hour.) HA pushes on change, so a
slow entity may not push for hours and your labels sit on placeholder text
after every reboot. I measured it: in the 14 seconds after boot, exactly one
of my subscriptions received a value. Fix both ends — repaint from a script on
a 30-second interval, and ask HA to re-emit the slow ones on
api: on_client_connected:. While you’re here, use one encoded sensor for
related values (xp=418;lvl=3;pct=41) rather than nine subscriptions; the
parser is in the repo and HA states cap at 255 characters.
esphome/patterns/encoded-state-sensor.yaml. Check: reboot the panel and
watch it fill in rather than sit blank.
7. The nice-to-haves. (An evening.) The two-stage ambient clock
(patterns/tiles-nav-and-idle.yaml), the debounced status badge
(patterns/debounced-state-badge.yaml) for anything with an alarm state, and
optimistic tiles that repaint the instant you tap them so the panel feels
instant. That last one is deterministic toggles only — never for anything
with a confirmation dialog, or the panel confidently shows you something that
never happened. Check: tap a light and time it. It should feel like a light
switch.
8. The pet, if you want it. (An evening.) Install the HA package from
homeassistant/packages/, then seed the settings — a fresh install starts
with pet_enabled: off and earns absolutely nothing until you turn it on. This
trips everybody, including me. Check: sensor.indicator_pet has a real
state in Developer Tools before you touch the panel.
9. Eyes and a finger, if you want them. (An evening.) Drop
esphome/components/panel_snapshot/ next to your device YAML, add the
external_components block and panel_snapshot: from the repo README, and
reflash. Now http://<panel>:8080/view is your panel in a browser tab —
screenshot refreshing, clicks landing as taps — and your agent can verify
its own work by looking. Check: fetch /screenshot, and confirm your
post-flash routine now includes looking at it.
go build one
Everything’s on GitHub under MIT:
skyflyt/sensecap-ha-panel.
Steps 1 to 3 are one evening, and at the end of it there’s a screen on your
desk with your house on it. That’s the bit that hooks you; everything after is
just deciding what you want on it.
One thing I owe you: that grid badge has never actually rendered in red. I’ve
had one outage, and the obvious way to test it turned out to be wired into
fifteen references across four live automations, including triggers named
“Power outage” and “Power restored”. Faking the value would have driven real
exterior loads at nine on a Sunday night. A demo that drives real hardware
is not a demo.
So it’s untested, it’s in the limitations page rather than buried, and I’m
quietly hoping for a storm.
Open an issue if you get stuck. I’d genuinely like to see what you put on
yours.